1.Java网络编程
本系列主要简单概述Java网络编程,为Java web阶段打好基础。
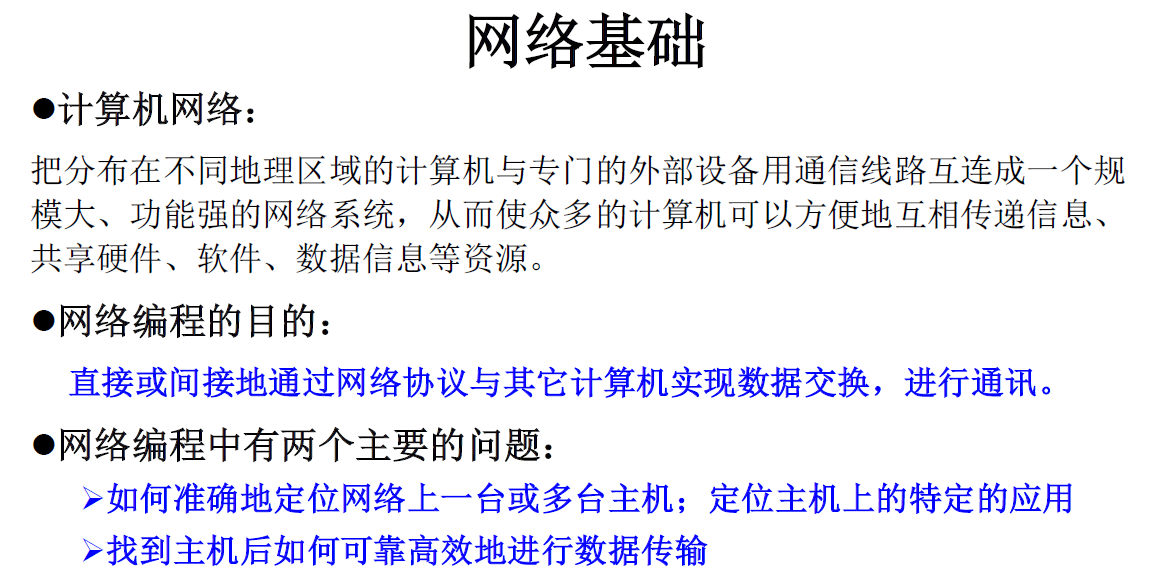
实现网络通信需要解决的两个问题
- 如何准确地定位网络上一台或多台主机;定位主机上的特定的应用
- 找到主机后如何可靠高效地进行数据传输
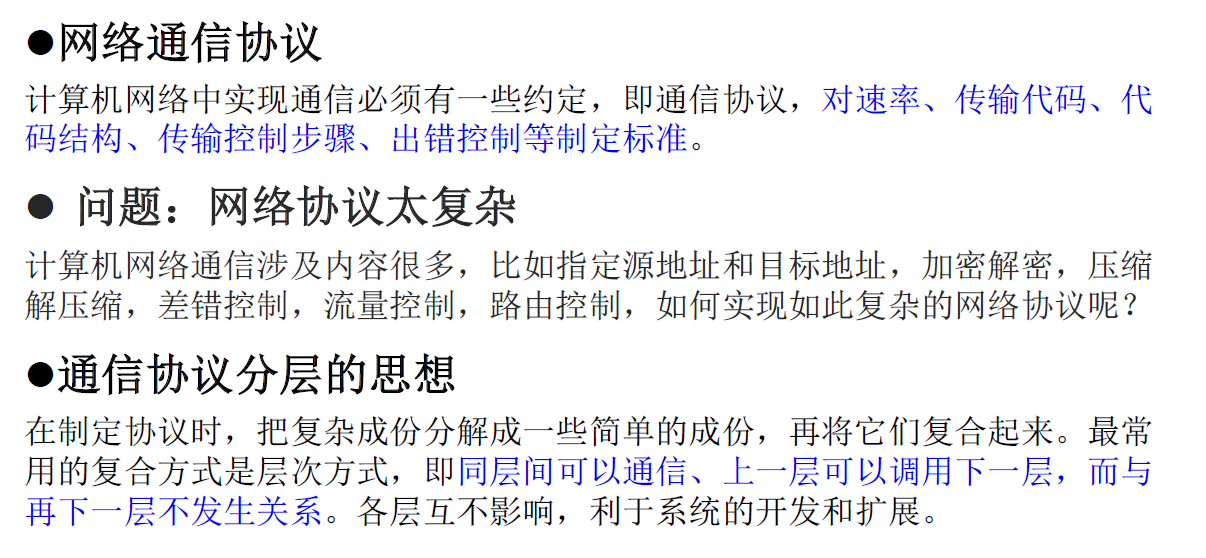
2.网络通信要素
网络通信的两个要素
对应问题一:通信双方地址,IP和端口号
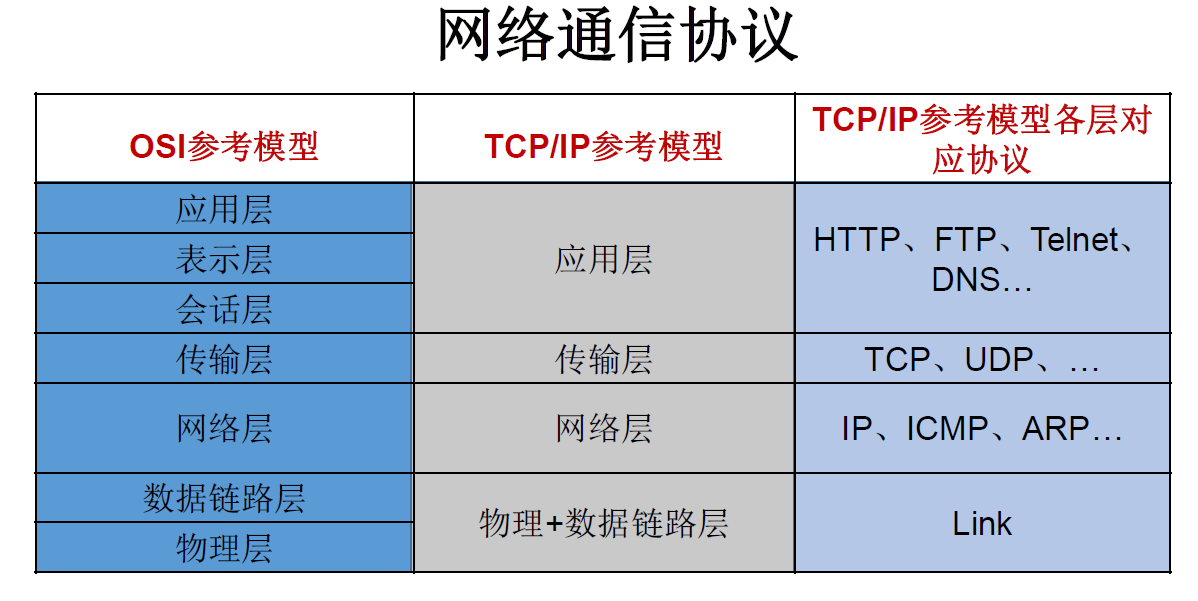
对应问题二:提供网络通信协议:TCP/IP参考模型(应用层、传输层、网络层、物理+数据链路层)
网络通信协议有2套参考模型,其中OSI参考模型过于理想化,未能在因特网上进行广泛推广,TCP/IP参考模型是事实上的国际标准。
通信要素一:IP和端口号
IP的理解:
IP:唯一的标识 Internet 上的计算机(通信实体)
在Java中使用InetAddress类代表IP
IP分类:IPv4 和 IPv6 ; 万维网 和 局域网
域名: www.baidu.com www.mi.com www.sina.com www.jd.com
本地回路地址:127.0.0.1 对应着:localhost
InetAddress类:
此类的一个对象就代表着一个具体的IP地址。
实例化,没有提供公共的构造器,而是提供了如下几个静态方法来获取 InetAddress实例。
1
2
3
| getByName(String host) 、 getLocalHost()
public static InetAddress getLocalHost()
public static InetAddress getByName(String host)
|
1
2
3
4
5
6
7
8
9
10
11
12
13
| @Test
public void test1(){
try {
InetAddress inet1 = InetAddress.getByName("192.168.10.14");
System.out.println(inet1);
InetAddress inet2 = InetAddress.getByName("localhost");
System.out.println(inet2);
} catch (UnknownHostException e) {
e.printStackTrace();
}
}
|
常用方法,2个。
1
2
3
4
5
6
7
8
9
| getHostName() / getHostAddress()
public String getHostAddress():返回 IP 地址字符串(以文本表现形式)。
public String getHostName():获取此 IP 地址的主机名
InetAddress inet1 = InetAddress.getByName("www.baidu.com");
System.out.println(inet1.getHostName());
System.out.println(inet1.getHostAddress());
|
端口号的理解:
正在计算机上运行的进程。
- 要求:不同的进程不同的端口号
- 范围:被规定为一个 16 位的整数 0~65535。
- 端口号与IP地址的组合得出一个网络套接字:Socket
网络编程也被称为Socket编程。
通信要素二:网络通信协议
传输层协议中有两个非常重要的协议:
传输控制协议 TCP(Transmission Control Protocol)
用户数据报协议 UDP(User Datagram Protocol)
这两个协议都是传输层的协议,但有所不同。
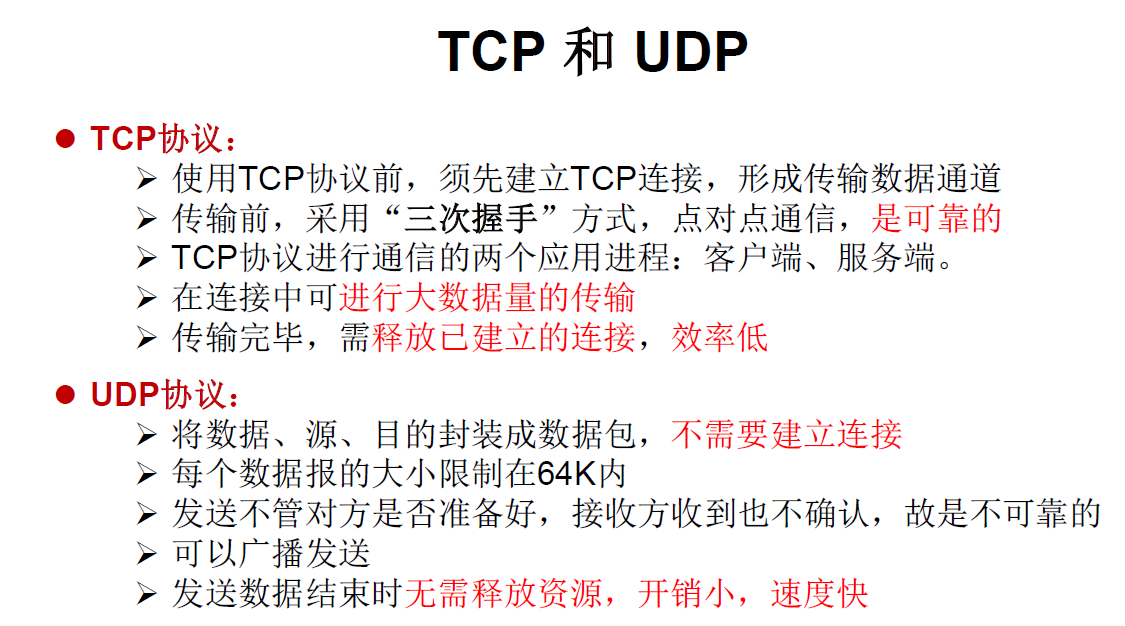
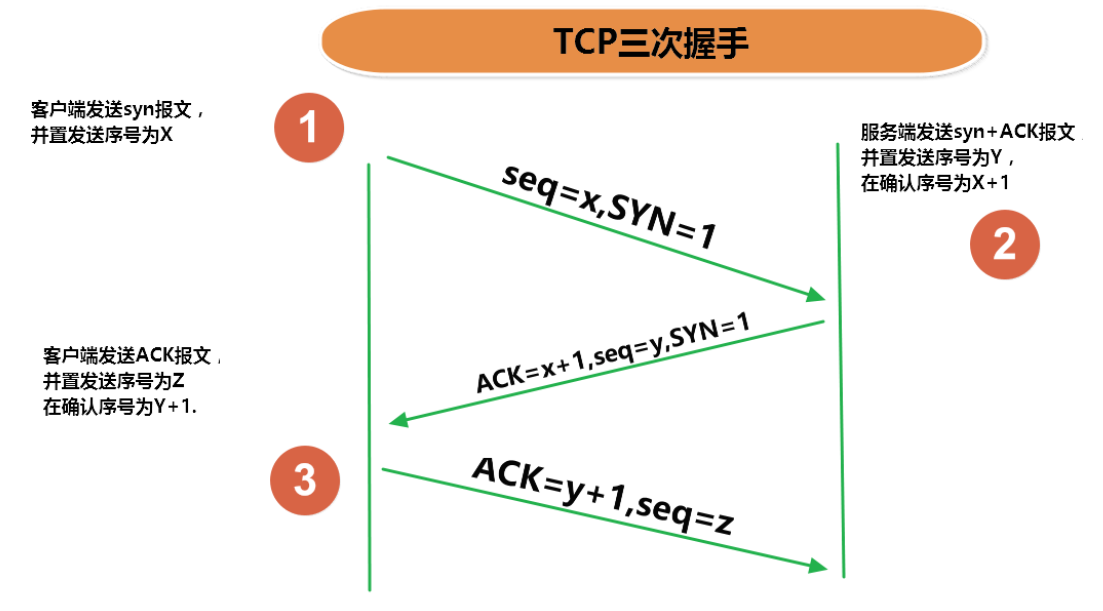
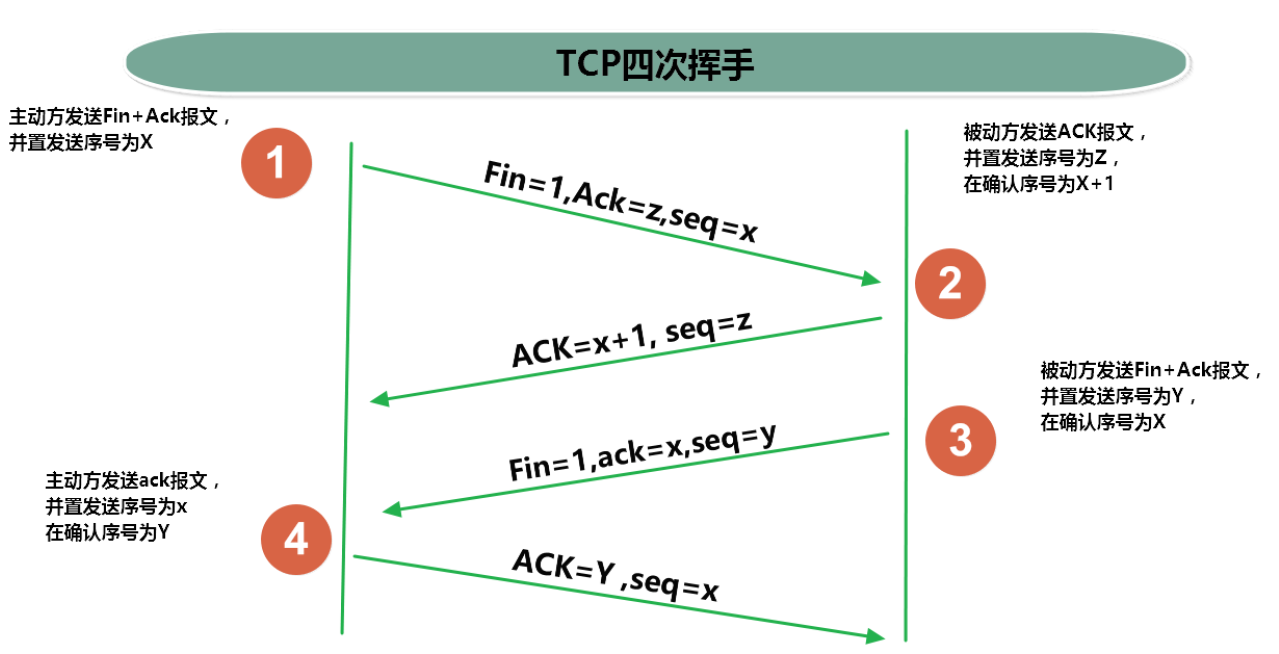
TCP的三次握手和四次挥手
TCP类似生活中打电话,UDP类似生活中发短信。
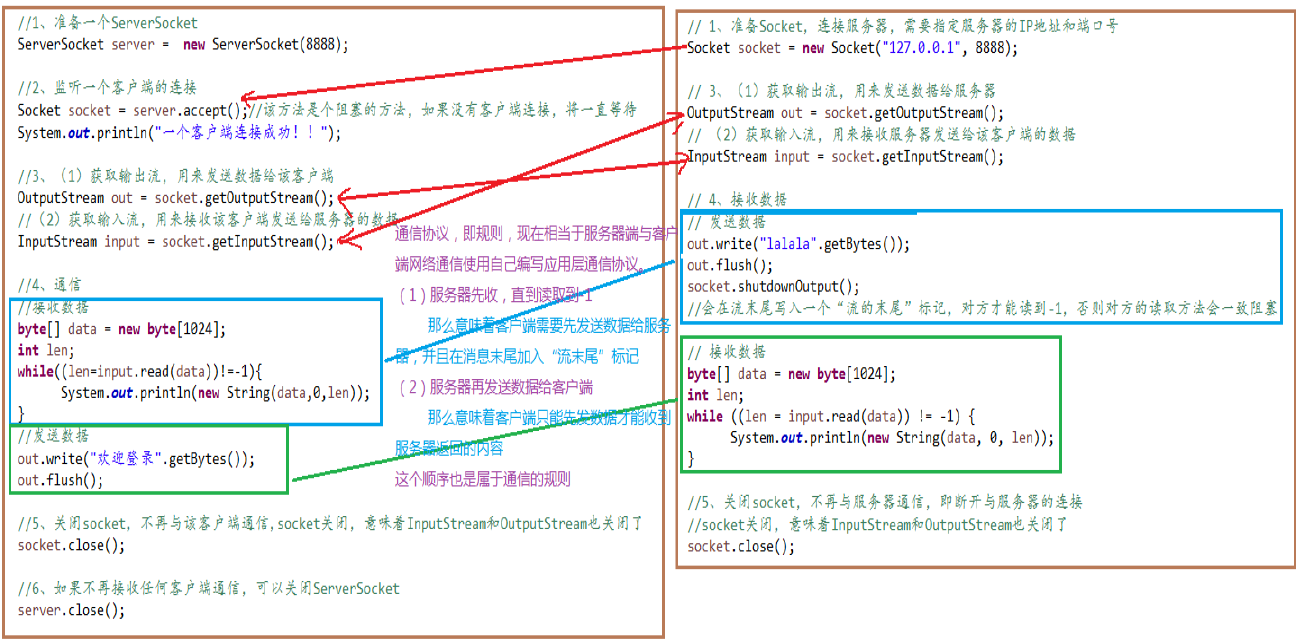
TCP网络编程
例子1:客户端发送信息给服务端,服务端将数据显示在控制台上。
1
2
3
4
5
6
7
8
9
10
11
12
13
14
15
16
17
18
19
20
21
22
23
24
25
26
27
28
29
30
31
32
33
34
35
36
37
38
39
40
41
42
43
44
45
46
47
48
49
50
51
52
53
54
55
56
57
58
59
60
61
62
63
64
65
66
67
68
69
70
71
72
73
74
75
76
77
78
79
80
81
82
83
84
85
86
87
88
89
90
91
92
93
94
95
96
97
|
@Test
public void client() {
Socket socket = null;
OutputStream os = null;
try {
InetAddress inet = InetAddress.getByName("127.0.0.1");
socket = new Socket(inet,8899);
os = socket.getOutputStream();
os.write("你好,我是客户端!".getBytes());
} catch (IOException e) {
e.printStackTrace();
} finally {
try {
if (os != null)
os.close();
} catch (Exception e) {
e.printStackTrace();
} finally {
try {
if (socket != null)
socket.close();
} catch (Exception e) {
e.printStackTrace();
}
}
}
}
@Test
public void server() {
ServerSocket ss = null;
Socket socket = null;
InputStream is = null;
ByteArrayOutputStream baos = null;
try {
ss = new ServerSocket(8899);
socket = ss.accept();
is = socket.getInputStream();
baos = new ByteArrayOutputStream();
byte[] buffer = new byte[20];
int len;
while ((len = is.read(buffer)) != -1){
baos.write(buffer,0,len);
}
System.out.println(baos.toString());
System.out.println("收到了来自于:" + socket.getInetAddress().getHostAddress() + "的数据");
} catch (IOException e) {
e.printStackTrace();
} finally {
try {
if (baos != null)
baos.close();
} catch (Exception e) {
e.printStackTrace();
}
try {
if (is != null)
is.close();
} catch (Exception e) {
e.printStackTrace();
}
try {
if (socket != null)
socket.close();
} catch (Exception e) {
e.printStackTrace();
}
try {
if (ss != null)
ss.close();
} catch (Exception e) {
e.printStackTrace();
}
}
}
|
例子2:客户端发送文件给服务端,服务端将文件保存在本地。
1
2
3
4
5
6
7
8
9
10
11
12
13
14
15
16
17
18
19
20
21
22
23
24
25
26
27
28
29
30
31
32
33
34
35
36
37
38
39
40
41
42
43
44
45
46
47
48
49
50
51
52
53
54
55
56
57
58
59
60
61
62
63
64
65
66
67
68
69
70
71
72
73
74
75
76
77
78
79
80
81
82
83
84
85
86
87
88
89
90
91
92
93
94
95
96
97
98
99
100
|
@Test
public void client() {
Socket socket = null;
OutputStream os = null;
FileInputStream fis = null;
try {
socket = new Socket(InetAddress.getByName("127.0.0.1"),8899);
os = socket.getOutputStream();
fis = new FileInputStream(new File("miku.png"));
byte[] buffer = new byte[5];
int len;
while ((len = fis.read(buffer)) != -1){
os.write(buffer,0,len);
}
} catch (IOException e) {
e.printStackTrace();
} finally {
try {
if (fis != null)
fis.close();
} catch (Exception e) {
e.printStackTrace();
}
try {
if (os != null)
os.close();
} catch (Exception e) {
e.printStackTrace();
}
try {
if (socket != null)
socket.close();
} catch (Exception e) {
e.printStackTrace();
}
}
}
@Test
public void server() {
ServerSocket ss = null;
Socket socket = null;
InputStream is = null;
FileOutputStream fos = null;
try {
ss = new ServerSocket(8899);
socket = ss.accept();
is = socket.getInputStream();
fos = new FileOutputStream(new File("test2.png"));
byte[] buffer = new byte[5];
int len;
while ((len = is.read(buffer)) != -1){
fos.write(buffer,0,len);
}
System.out.println("收到了来自于:" + socket.getInetAddress().getHostAddress() + "的数据");
} catch (IOException e) {
e.printStackTrace();
} finally {
try {
if (fos != null)
fos.close();
} catch (Exception e) {
e.printStackTrace();
}
try {
if (is != null)
is.close();
} catch (Exception e) {
e.printStackTrace();
}
try {
if (socket != null)
socket.close();
} catch (Exception e) {
e.printStackTrace();
}
try {
if (ss != null)
ss.close();
} catch (Exception e) {
e.printStackTrace();
}
}
}
|
注意:io流不要重复关闭。关闭顺序要求先开后,否则会报异常“java.io.IOException:Stream Closed”。
外层流关闭后内层流也会关闭。
例子3:客户端发送文件给服务端,服务端将文件保存在本地,并返回信息。
1
2
3
4
5
6
7
8
9
10
11
12
13
14
15
16
17
18
19
20
21
22
23
24
25
26
27
28
29
30
31
32
33
34
35
| @Test
public void client() throws IOException {
Socket socket = new Socket(InetAddress.getByName("127.0.0.1"),9090);
OutputStream os = socket.getOutputStream();
FileInputStream fis = new FileInputStream(new File("beauty.jpg"));
byte[] buffer = new byte[1024];
int len;
while((len = fis.read(buffer)) != -1){
os.write(buffer,0,len);
}
socket.shutdownOutput();
InputStream is = socket.getInputStream();
ByteArrayOutputStream baos = new ByteArrayOutputStream();
byte[] bufferr = new byte[20];
int len1;
while((len1 = is.read(buffer)) != -1){
baos.write(buffer,0,len1);
}
System.out.println(baos.toString());
fis.close();
os.close();
socket.close();
baos.close();
}
|
1
2
3
4
5
6
7
8
9
10
11
12
13
14
15
16
17
18
19
20
21
22
23
24
25
26
27
28
29
30
31
| @Test
public void server() throws IOException {
ServerSocket ss = new ServerSocket(9090);
Socket socket = ss.accept();
InputStream is = socket.getInputStream();
FileOutputStream fos = new FileOutputStream(new File("beauty2.jpg"));
byte[] buffer = new byte[1024];
int len;
while((len = is.read(buffer)) != -1){
fos.write(buffer,0,len);
}
System.out.println("图片传输完成");
OutputStream os = socket.getOutputStream();
os.write("你好,照片我已收到,非常漂亮!".getBytes());
fos.close();
is.close();
socket.close();
ss.close();
os.close();
}
|
客户端与服务端:
客户端:自定义,浏览器
服务端:自定义,Tomcat服务器
总结: